Configuration
Setting up an outgoing webhook is straightforward, you just need two pieces of information:- Callback URL: Where should the data be sent? This could be an endpoint in your own application or a third-party service that accepts webhooks.
- Signing secret: A secret key that proves the data came from Phare and wasn’t tampered with along the way.

Using the integration
Once your webhook is set up, you can connect it to alert rules in your projects. A default JSON payload based on the alert event you’ve chosen will be generated, customize it as needed to fit your specific use case.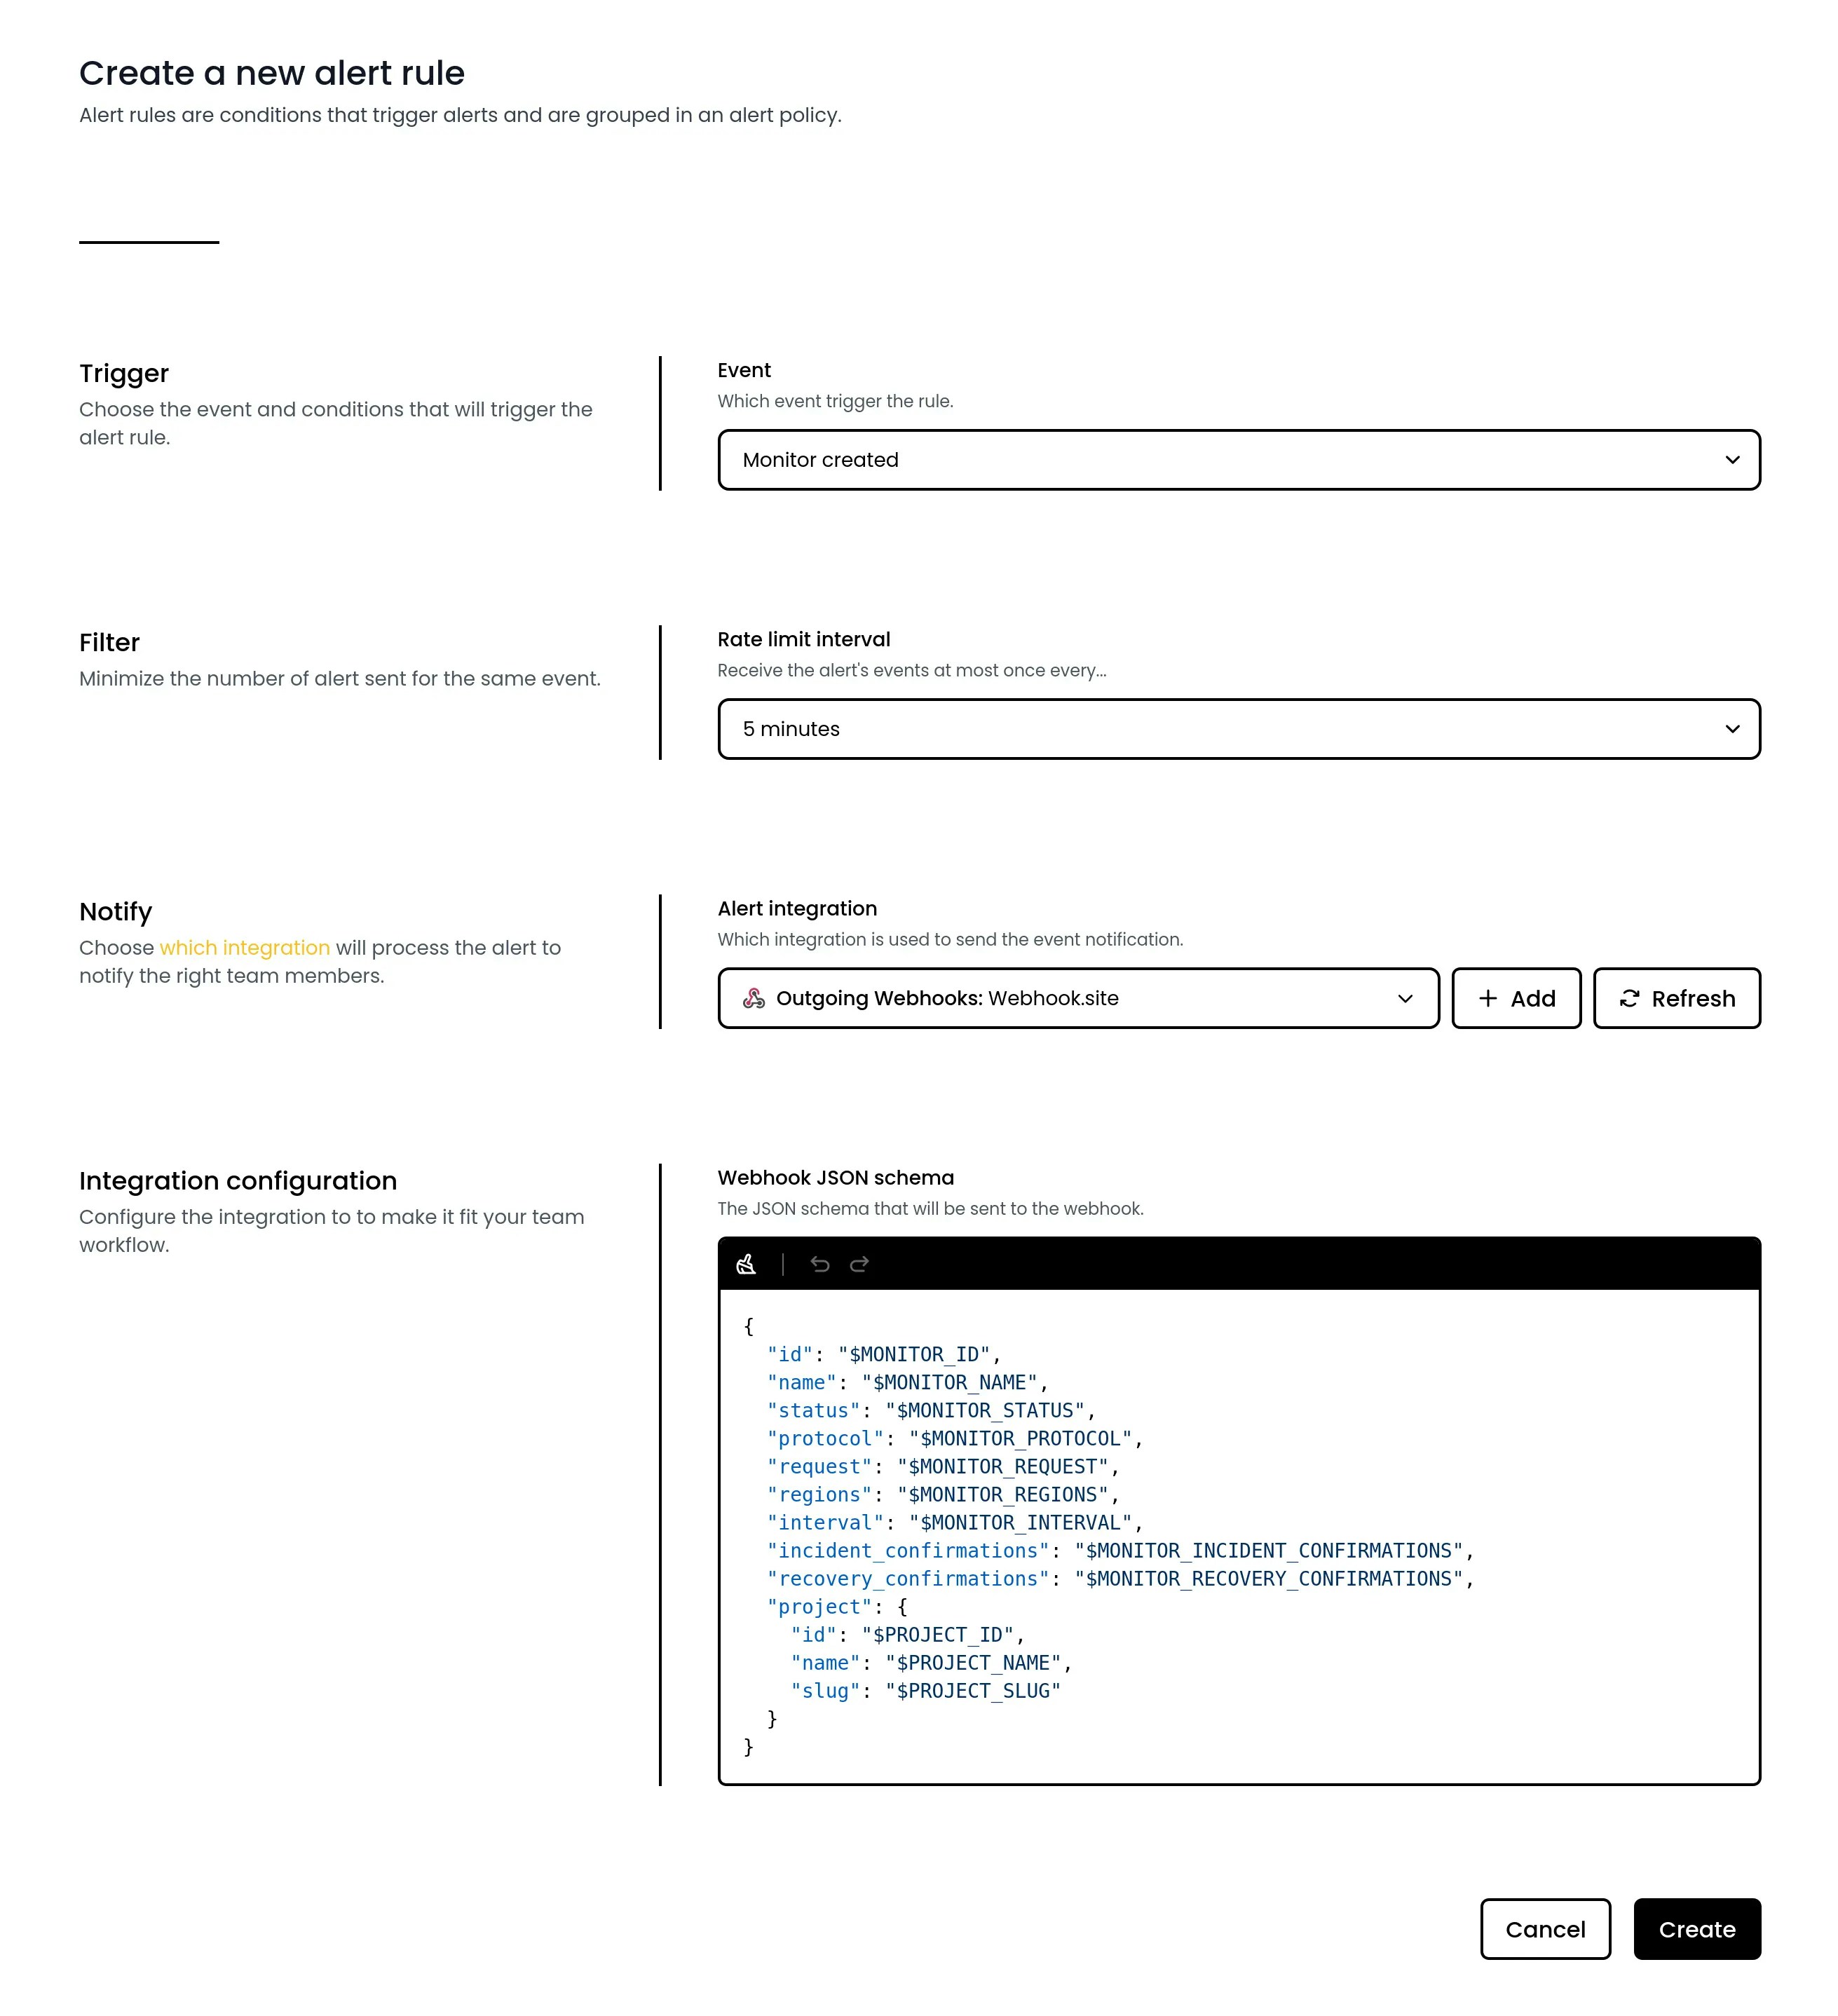
Delivery details
Outgoing webhooks are sent asPOST requests with a 30-second timeout. Each request includes:
Content-Type: application/jsonUser-Agent: Phare 1.0 (+https://phare.io)X-Phare-Request-Id: Unique delivery IDX-Phare-Request-Event: Alert event keyX-Phare-Request-Timestamp: Unix timestampX-Phare-Request-Signature: HMAC-SHA256 signature
Payload customization
{{ incident.slug }}. When the webhook is sent, Phare swaps the placeholders with real values.
JSON keys do not support placeholders.
Example template
Looping over list of entities
To define a schema for an entity that is part of a list, use$each and $item. The loop name should match the entity list name you want to iterate, such as affected_monitors. In the entity schema, use the item variable to access the current item properties.
Available entities by event
Monitor Created
Monitor Created
monitorproject
Monitor Deleted
Monitor Deleted
monitorproject
Monitor Certificate Discovered
Monitor Certificate Discovered
certificatemonitorproject
Monitor Certificate Expiring
Monitor Certificate Expiring
certificatemonitorproject
Incident Created
Incident Created
incidentprojectaffected_monitors(list)
Incident Recovered
Incident Recovered
incidentprojectaffected_monitors(list)
Incident Propagated
Incident Propagated
incidentprojectpropagated_monitor(the newly affected monitor)affected_monitors(list)
Incident Partially Recovered
Incident Partially Recovered
incidentprojectrecovered_monitor(the recovered monitor)affected_monitors(list)
Incident Comment Created
Incident Comment Created
commentcreatorincidentprojectaffected_monitors(list)
Incident Update Published
Incident Update Published
updatecreatorincidentprojectaffected_monitors(list)
Available fields by object
incident
incident
monitor
monitor
project
project
certificate
certificate
comment
comment
update
update
creator
creator
Webhook security
Trust but verify! Phare outgoing webhooks come with built-in security through HMAC-SHA256 signatures. This ensures the payloads you receive:- Actually came from Phare
- Haven’t been tampered with in transit
- Aren’t being replayed from previous requests
v0 (this will be bumped if the algorithm ever changes). You’ll find the timestamp in the X-Phare-Request-Timestamp header and the signature in the X-Phare-Request-Signature header.
You can also use X-Phare-Request-Id and X-Phare-Request-Event to correlate deliveries.
Here are some code examples to help you implement verification:
Retry policy
Network hiccups happen, which is why Phare outgoing webhooks don’t give up easily. If your endpoint doesn’t respond with a 2xx status code within 30 seconds, it will be retried up to four times (five attempts total) using an exponential backoff strategy:- First attempt: Immediate delivery
- First retry: After 1 minute
- Second retry: After 5 minutes
- Third retry: After 10 minutes
- Final retry: After 1 hour
Debugging
Webhooks not working as expected? Logs are available with the request and response details making troubleshooting a breeze, you only need to click the row you would like to inspect.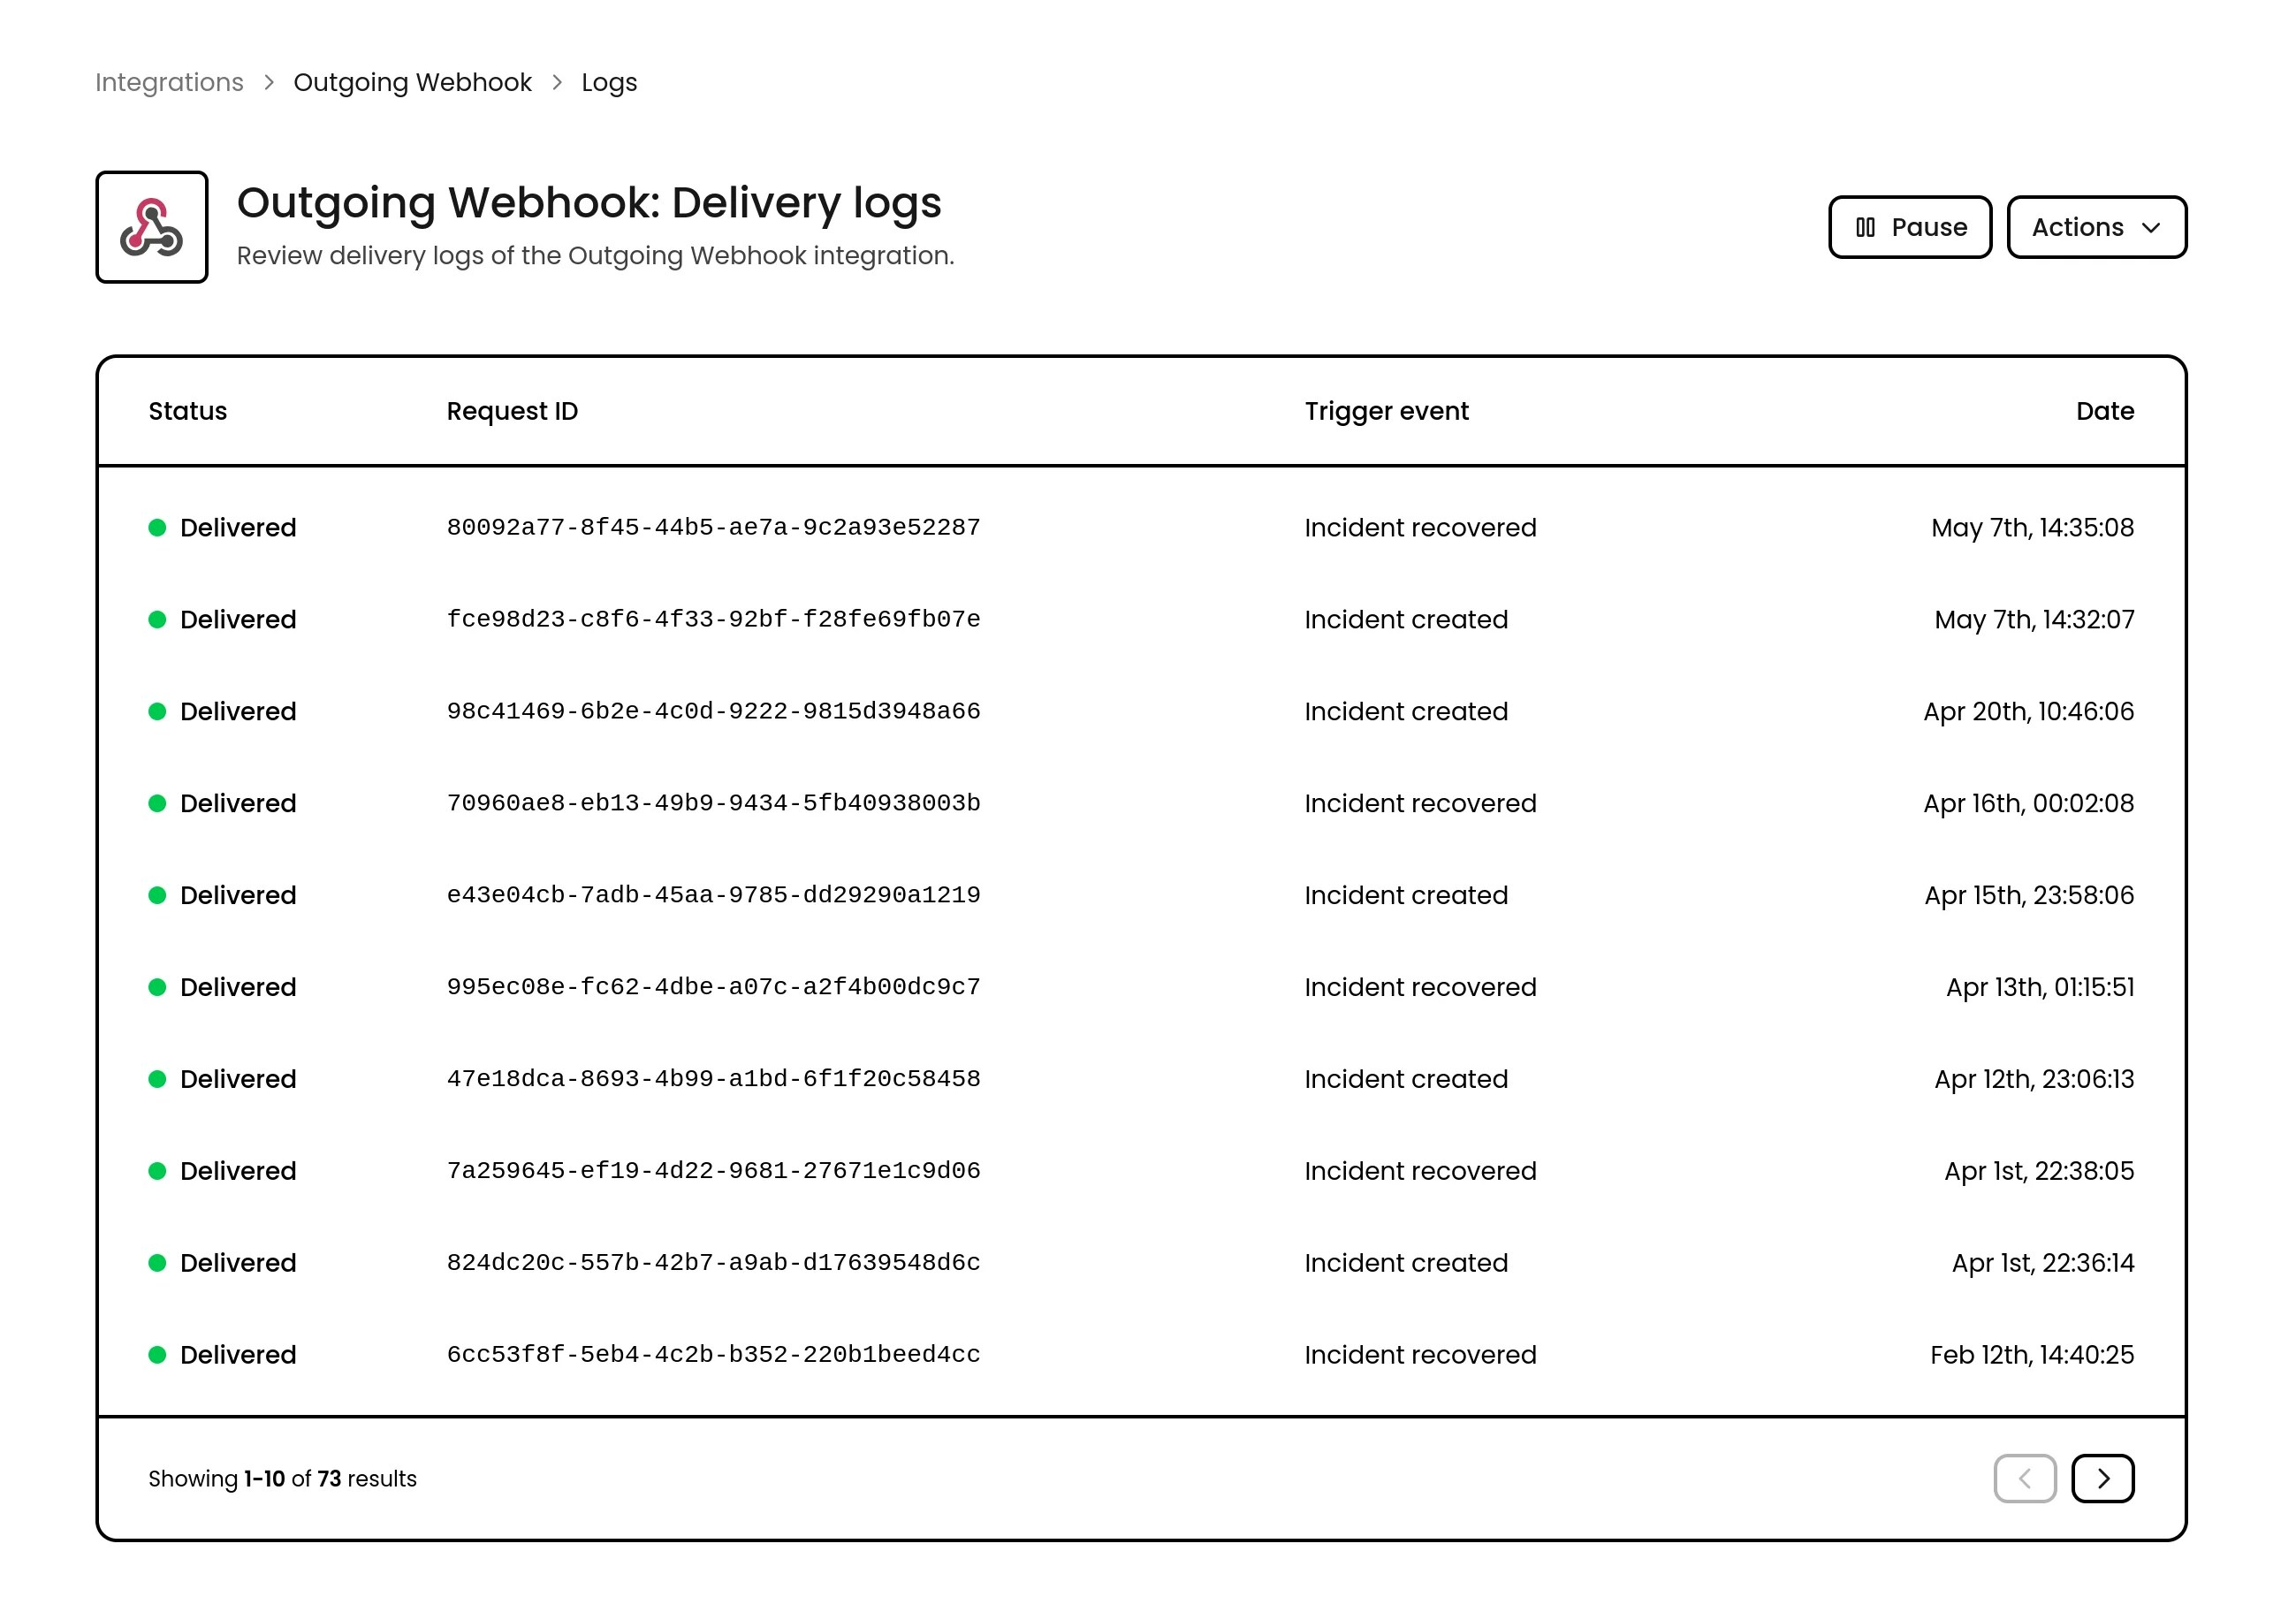
idcontent