Creating a status page
Create as many status pages as your projects need, there’s no limit. Pick which monitors to display, customize the look to match your brand, and give Phare a few seconds to generate an SSL certificate, your status page will be ready in no time.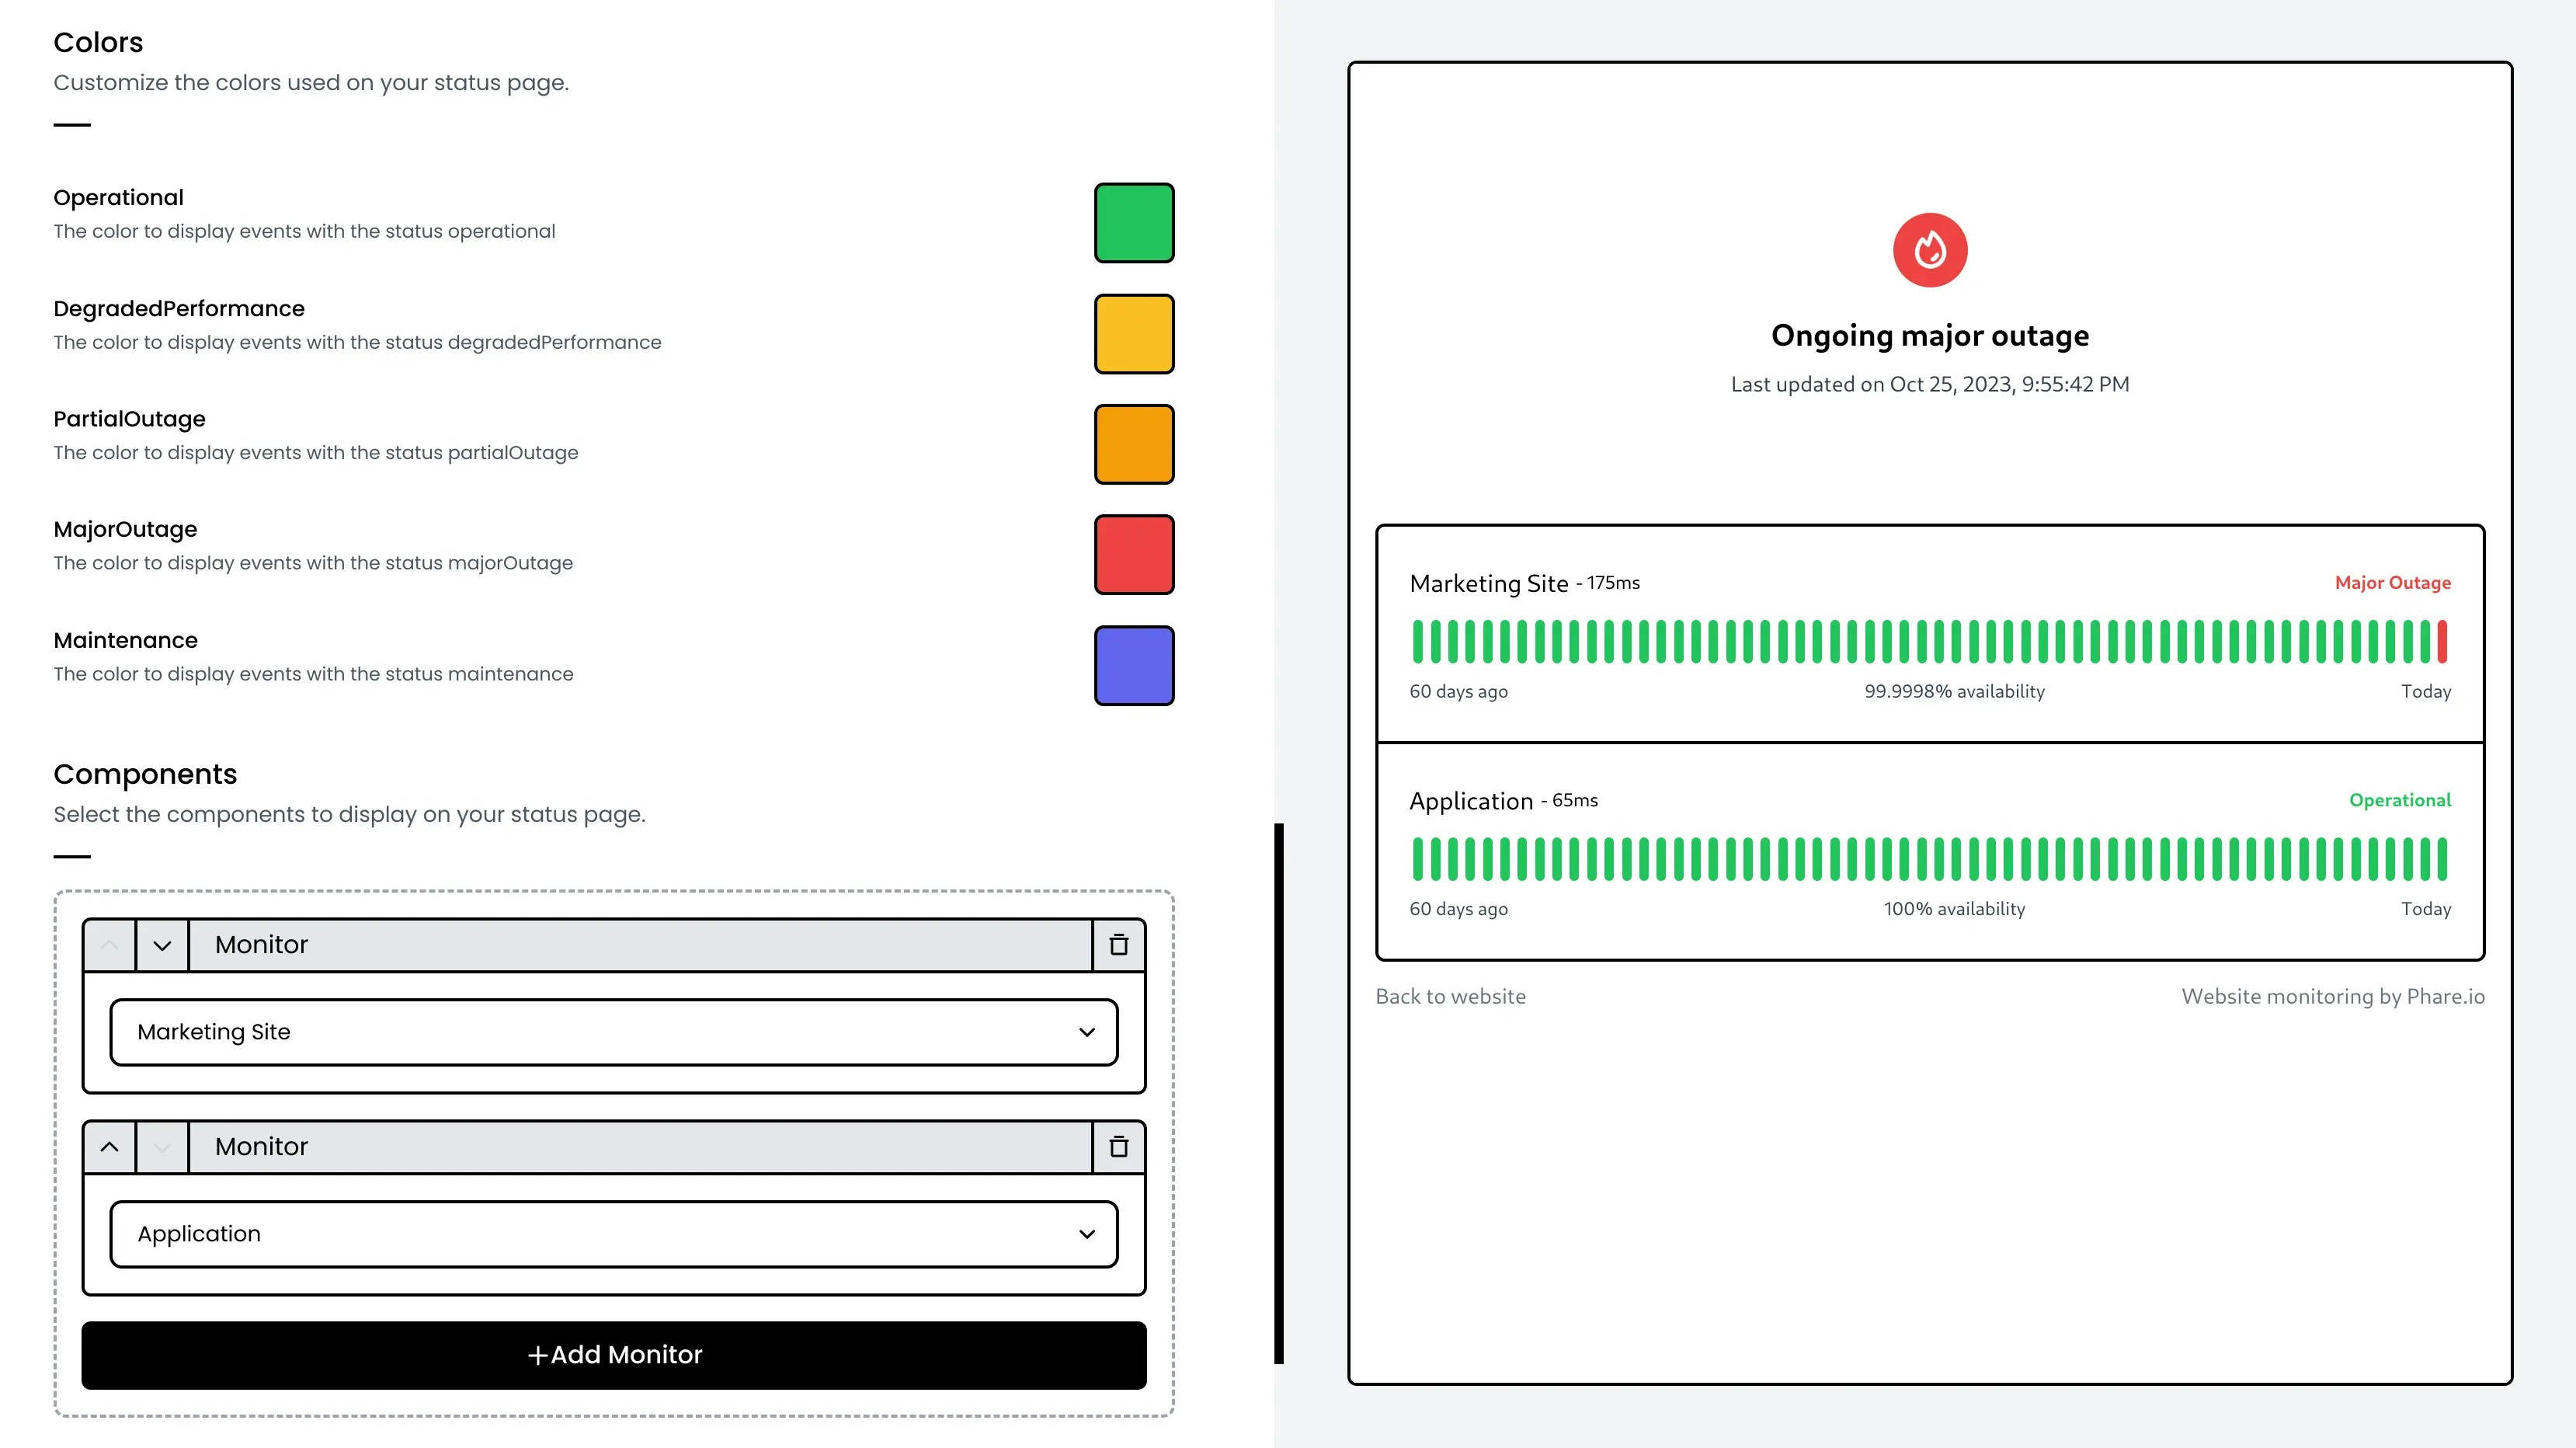
Phare domain
Every status page gets its own*.status.phare.io domain name, complete with SSL protection out of the box.
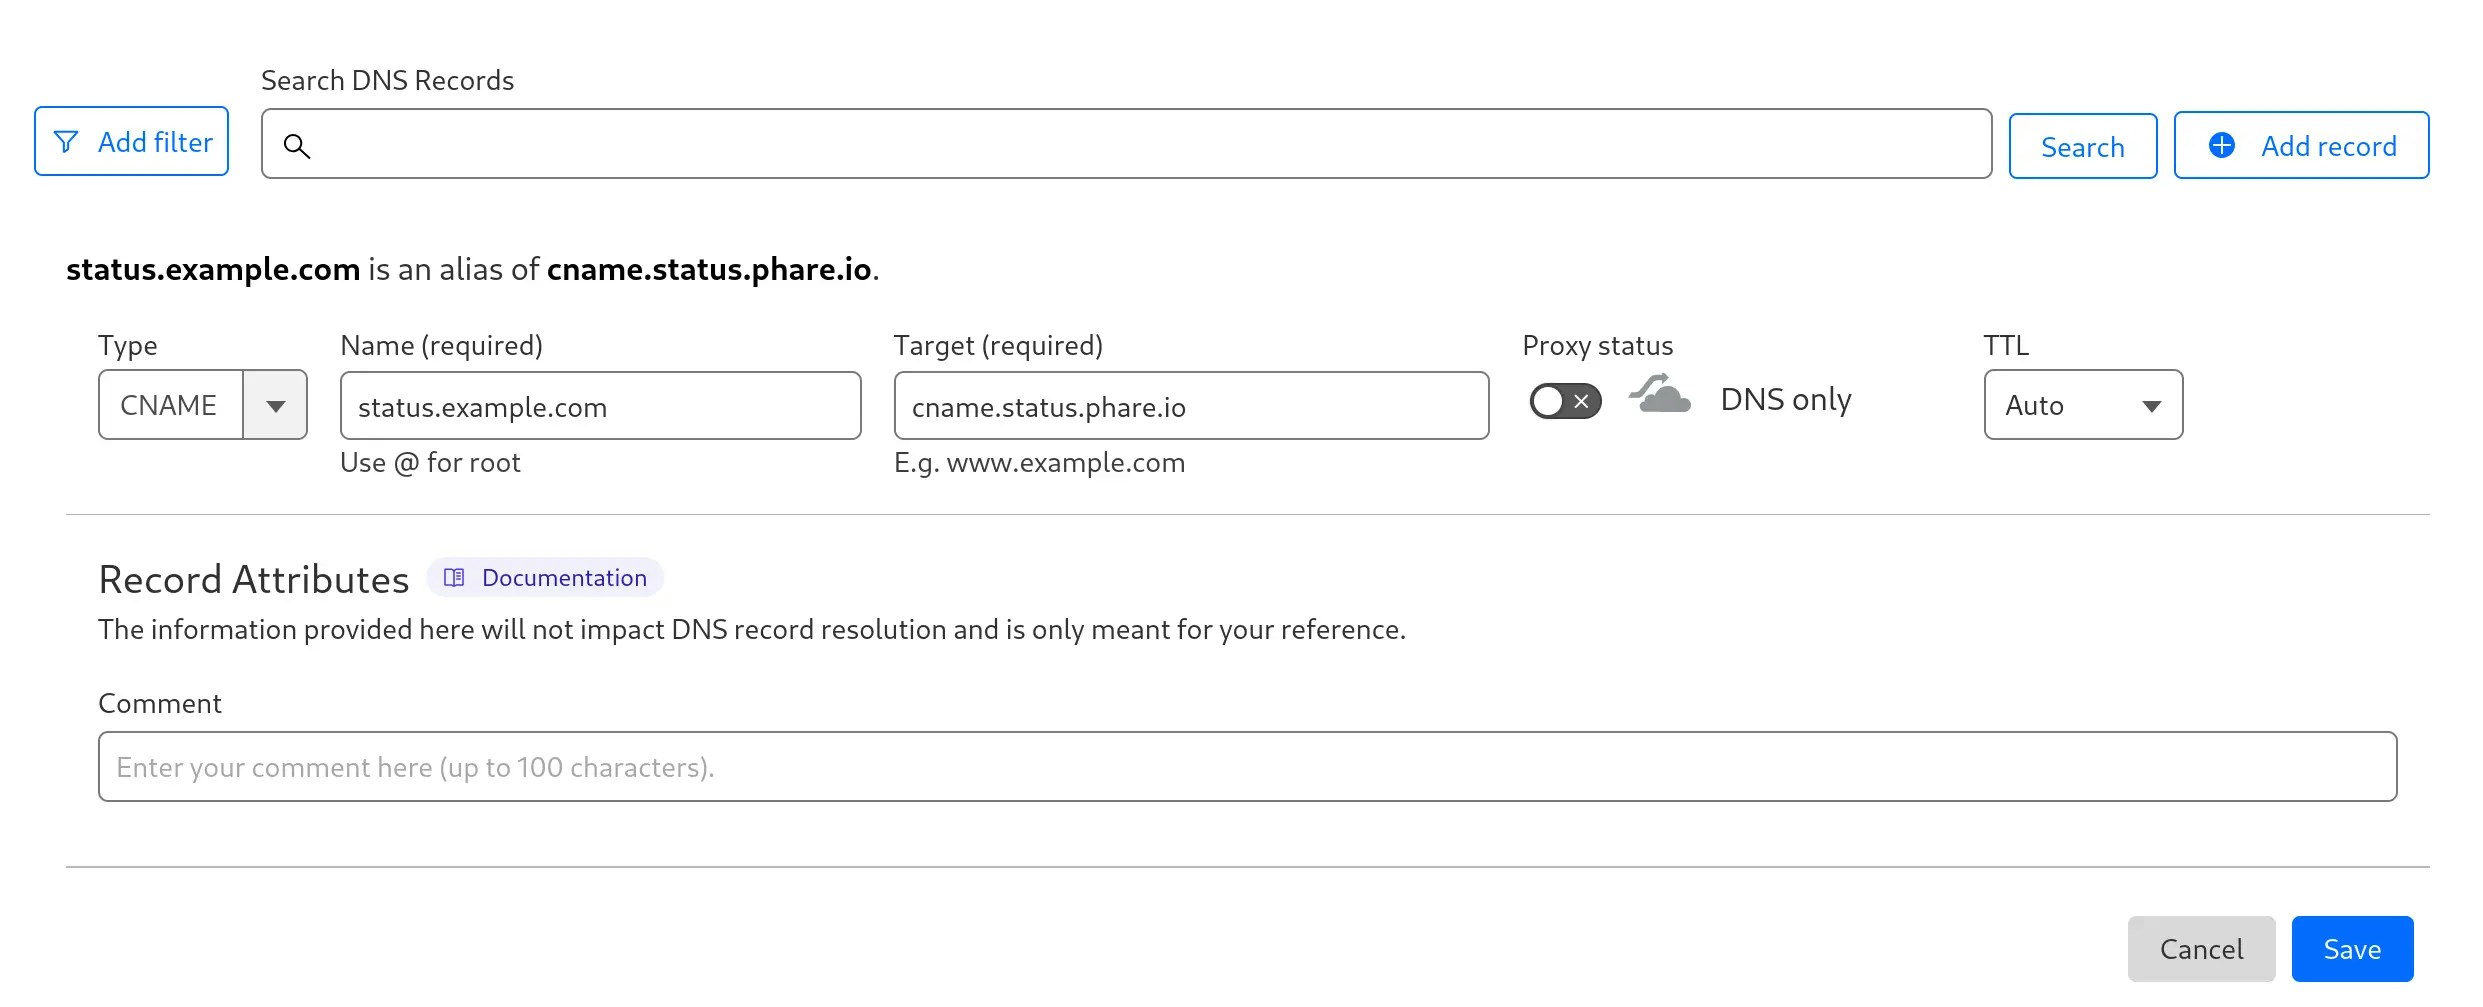
Custom domain
Want your status page on your own domain? Simply create a CNAME record in your DNS settings pointing tocname.status.phare.io:
Make sure your DNS is configured correctly so Phare can generate a valid SSL certificate. This usually takes a few minutes. Once verified, your Phare domain will automatically redirect to your custom domain.
Custom domain with Cloudflare DNS
Using Cloudflare? Make sure to create your CNAME with proxy status inDNS-only mode (keep the cloud icon gray, not orange) as shown below:
Custom domain with Bunny.net
Hello fellow Bunny enthusiast! Since Phare also uses Bunny.net as a DNS and certificate provider, there’s an extra security step, called multi-domain, required to make your domain work with Phare. Don’t worry, it’s quick and straightforward:1
Create a TXT record
Add this TXT record to your DNS settings to help Bunny.net verify your request:
2
Open a support ticket
Head over to your Bunny.net support hub and create a new ticket.
3
Write a message
Select the DNS department and send something like this (with your actual domain):
4
Wait for the ticket to be processed
Bunny’s support team is usually quick, sit tight for a few minutes.
5
Verify your custom domain
Once resolved, go back to your status page dashboard and hit the
Verify again button to activate your custom domain.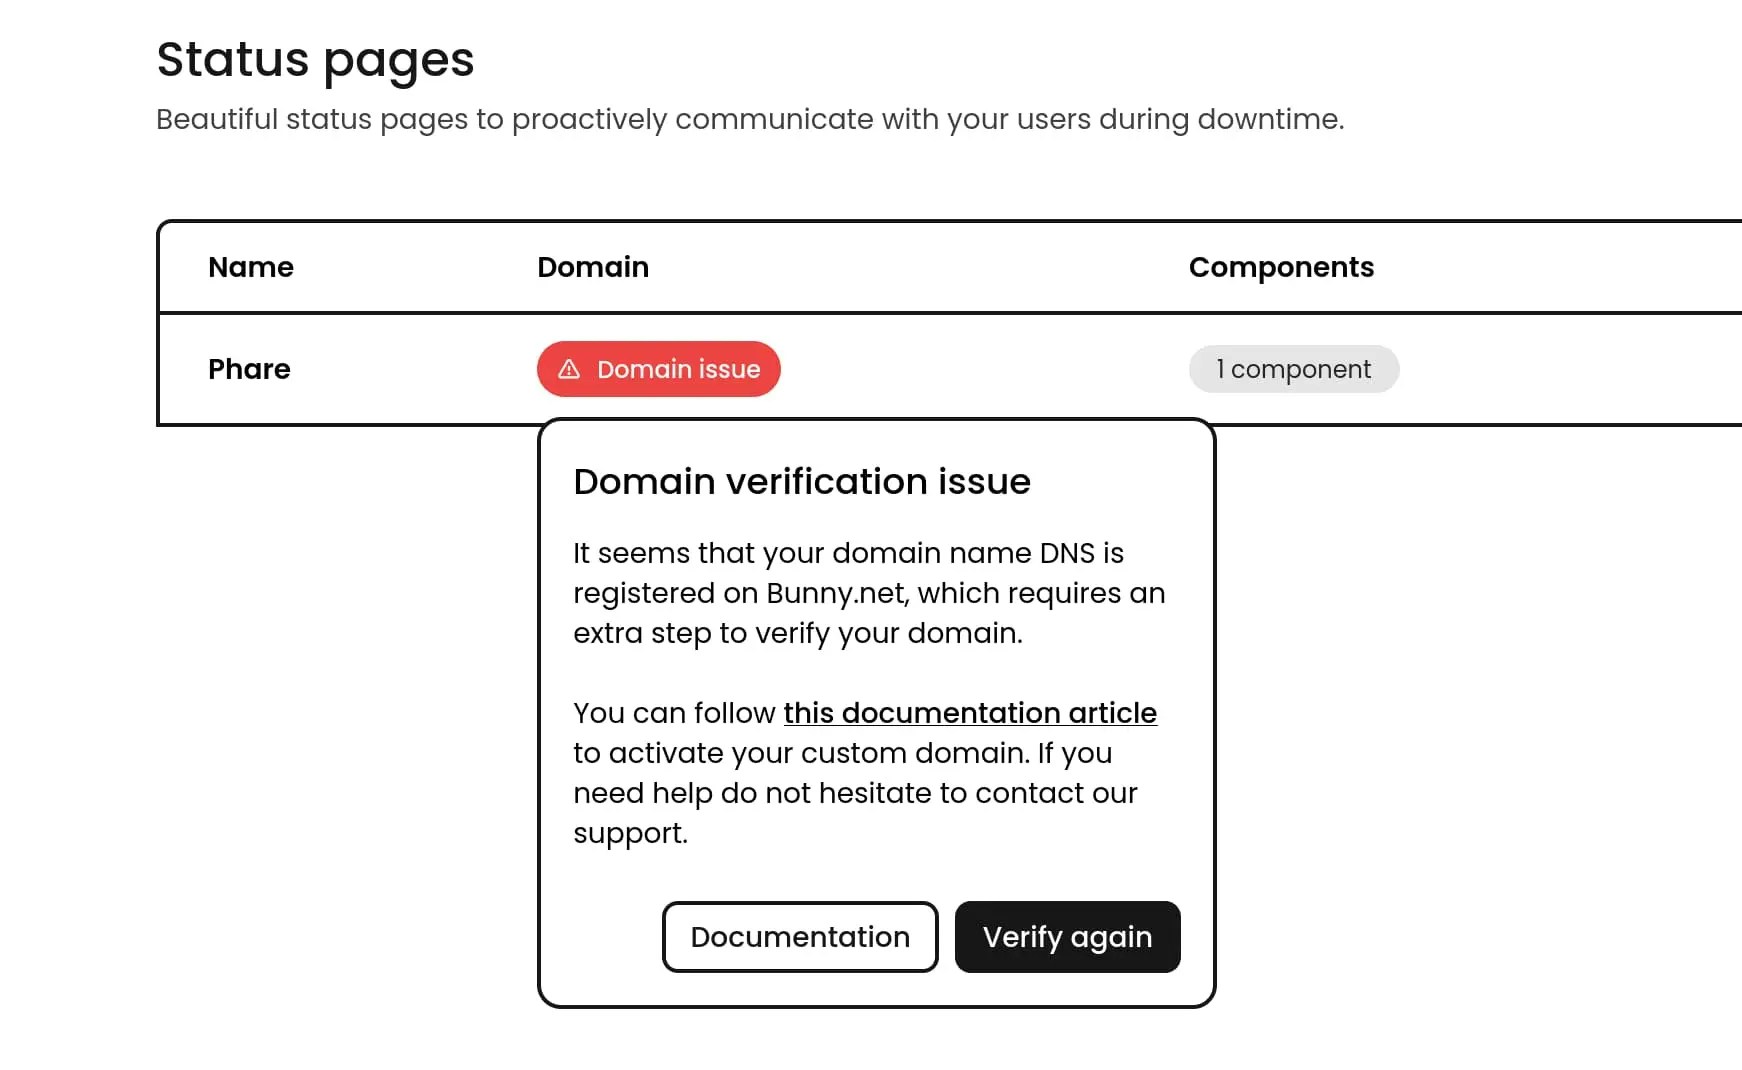
Known Issues
If you remove your domain name from your own Bunny DNS account, and later try to add it back, you will encounter the following error:It appears that the domain, or a subdomain of it, is already registered in
another account.
- Disable your status page in Phare
- Add your domain back to your Bunny account
Subscription
Your users can stay informed about your service’s status with automatic update subscriptions. Phare status pages come with built-in RSS and ATOM feeds, allowing for easy integration with various platforms.RSS and ATOM feeds
Every status page automatically includes feed endpoints that users can subscribe to:- RSS feed: Available at
https://status.example.com/history.rssorhttps://example.status.phare.io/history.rss - ATOM feed: Available at
https://status.example.com/history.atomorhttps://example.status.phare.io/history.atom
Slack feed
Phare provides a dedicated Slack-compatible RSS feed for easy integration with Slack workspaces:- Slack RSS feed: Available at
https://status.example.com/history.slack.rssorhttps://example.status.phare.io/history.slack.rss
Subscribing to feeds
Your users can subscribe to the standard RSS/ATOM feeds using:- Feed readers: Apps like Feedly, Inoreader, or NewsBlur
- Email notifications: Services that convert feeds to email alerts
- Other integrations: Many platforms like Microsoft teams or Discord can connect to standard RSS/ATOM feeds for notifications
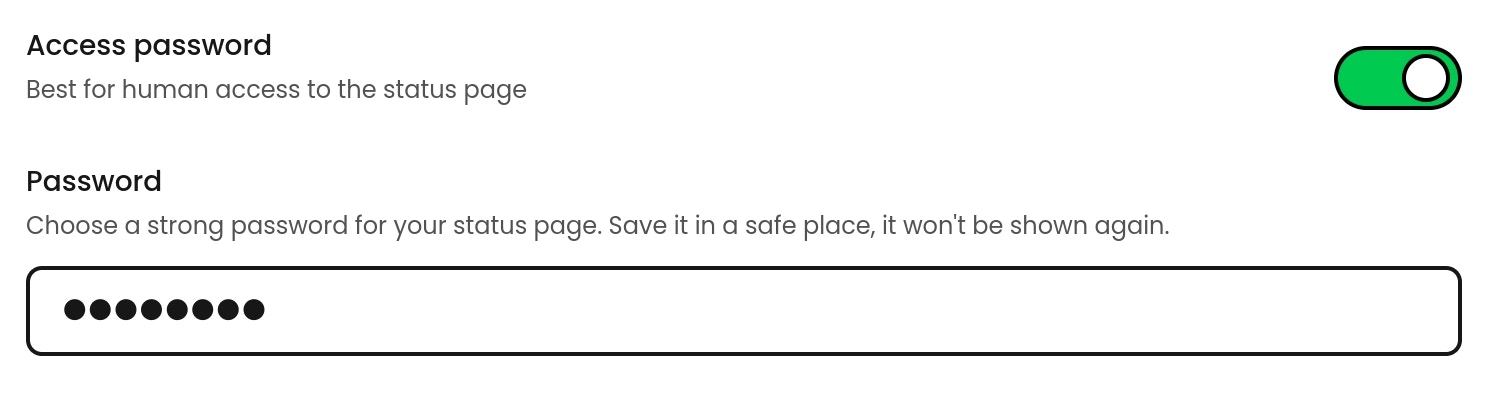
Access control
By default, status pages are publicly accessible. You can restrict access using three complementary control mechanisms. Multiple access controls can be activated to fit your needs, they are evaluated in order:- If the visitor’s IP is in the allowlist → access is granted
- If the URL includes a valid token query parameter → access is granted
- If a password is configured → the visitor is redirected to a login page
IP allowlist
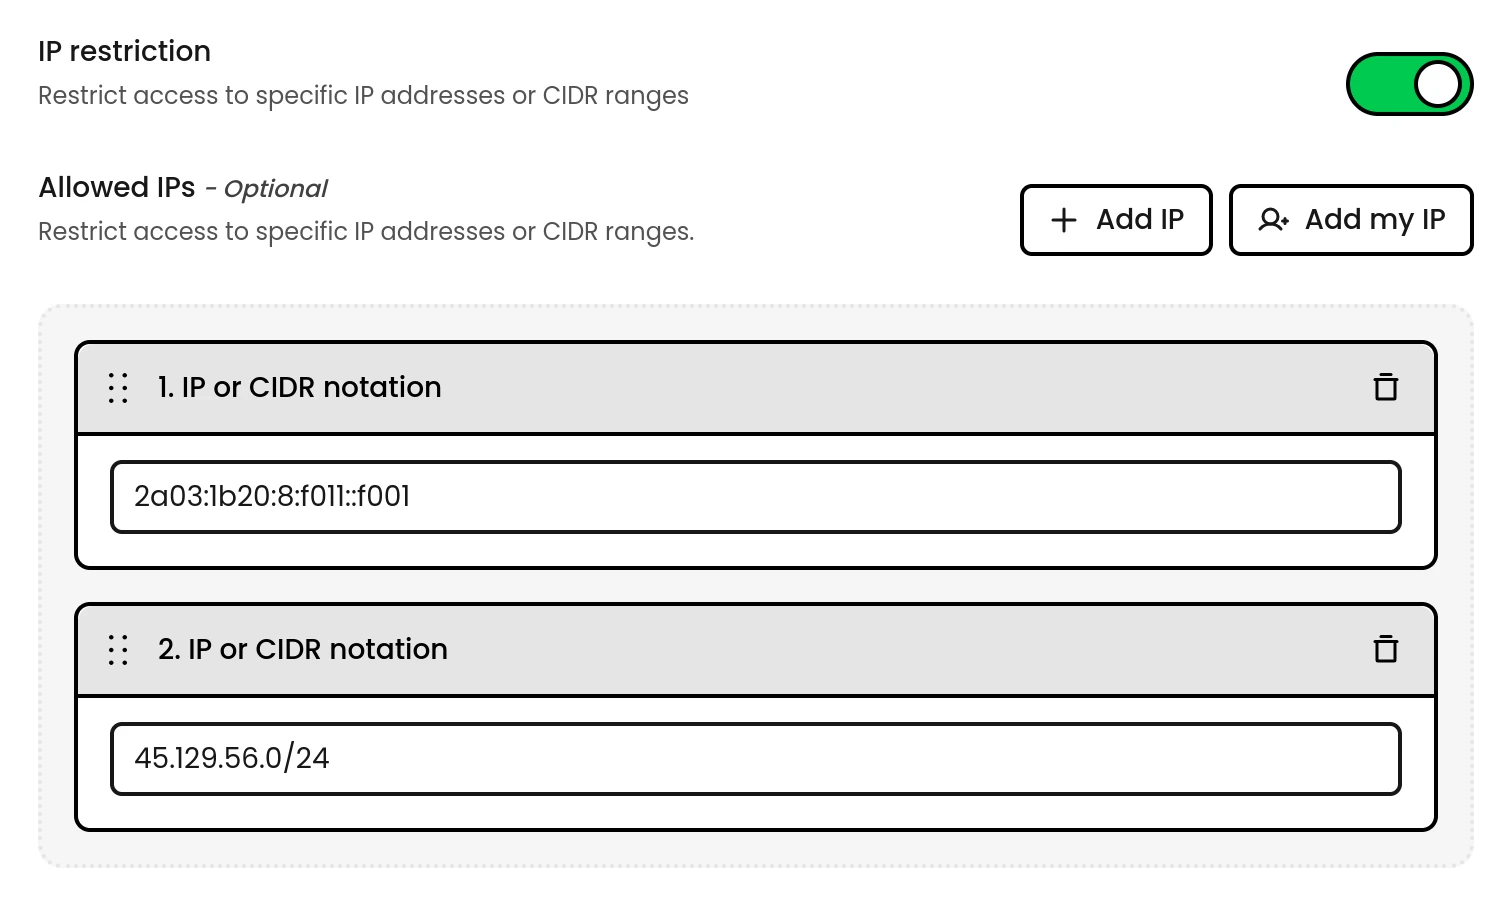
- Office or campus networks
- VPN exit nodes
- CI/CD infrastructure polling badges or feeds
Access token
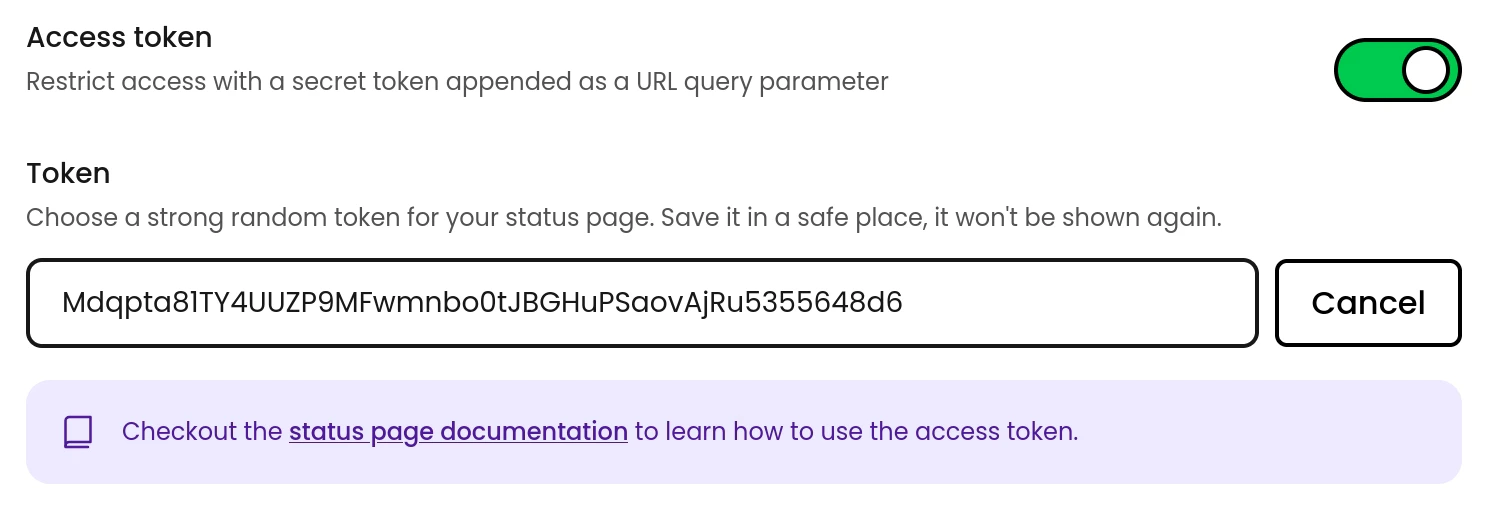
token query parameter to any status page URL to grant access. The token works on the main page, feeds, and badge endpoints:
Access password
Status badges
Once your status page is live, you get access to status badges you can proudly display on your website or repository. They’re a great way to show transparency and confidence in your service reliability. Access them through your status page’s action menu.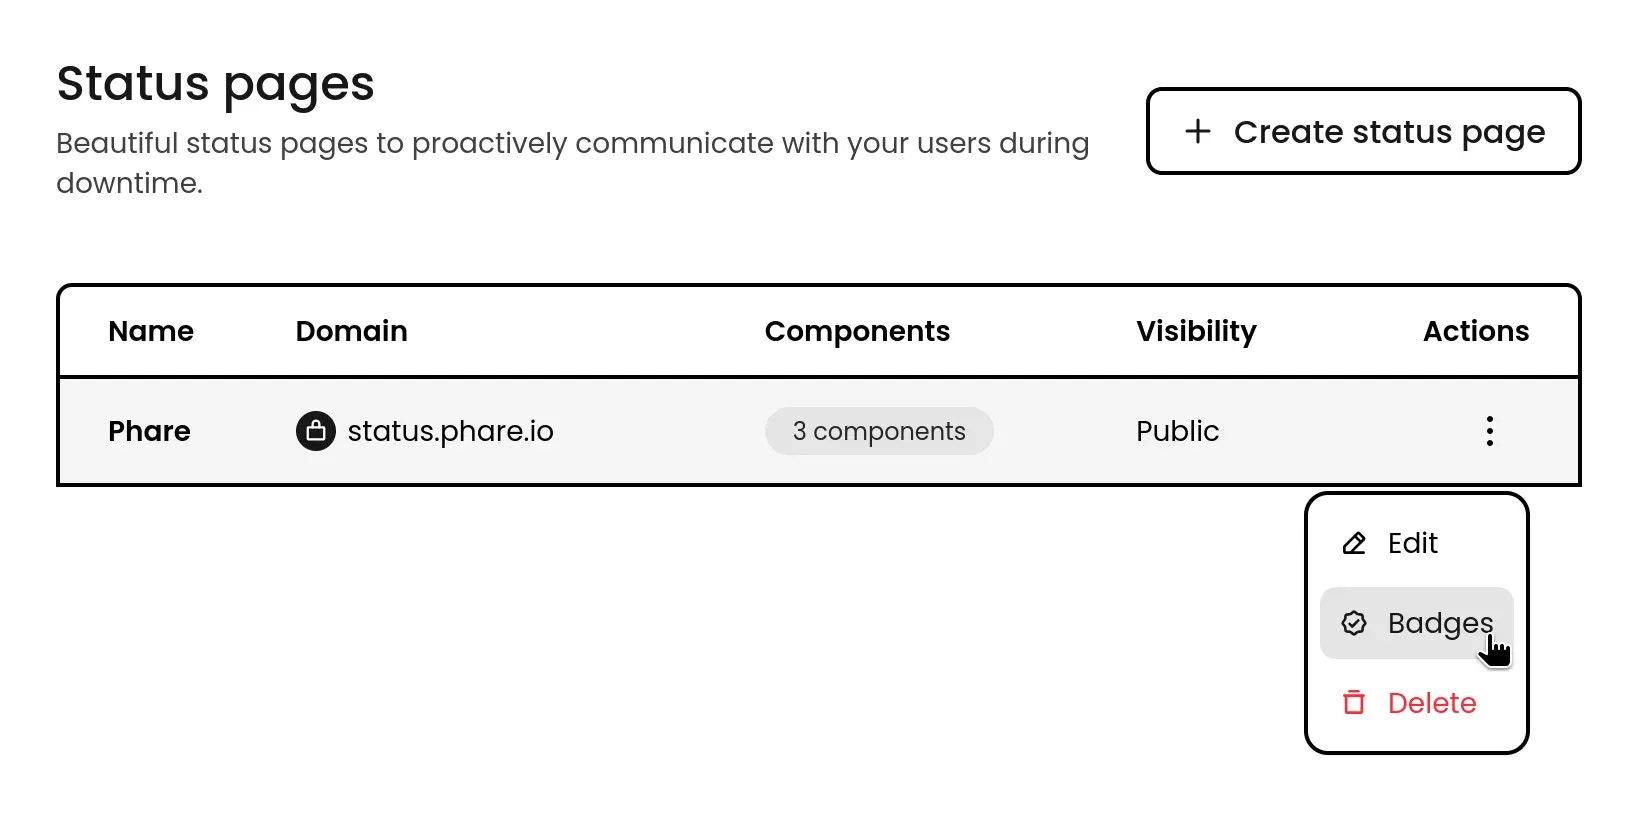
Embed badges
These badges are designed for your website and can be customized to fit right in with your design. They adapt to light/dark themes or can be forced to either style. You can adjust:align: For the live status badge positioning. Options:start,center, orend.background-light: Background color in light mode.background-dark: Background color in dark mode.text-light: Text color in light mode.text-dark: Text color in dark mode.